
Guide · Getting started
How to onboard a new client on RiskBee
Every client you manage on RiskBee gets its own isolated workspace: its own vendors, assessments, contracts and tasks. Onboarding a client sets that workspace up in three short steps. Here is what each step does and what to have ready before you start.
Last updated: 2026-08-28
Before you start: the "Add client" button only opens the wizard once your own MSP company profile is complete. If it isn't yet, the button instead links to your company settings with a prompt to finish that first.
The onboarding wizard
The wizard keeps your progress in the URL, so if you get interrupted partway through you can pick up exactly where you left off - there is also a "Finish later" option if you need to step away before a client's payment or profile details are ready. A client you haven't finished onboarding shows up on the Clients page inside a "Finish setting up" banner with a button that jumps you back into the wizard at the right step - it doesn't get a full client card until it's active.

Step 1 - Client basics
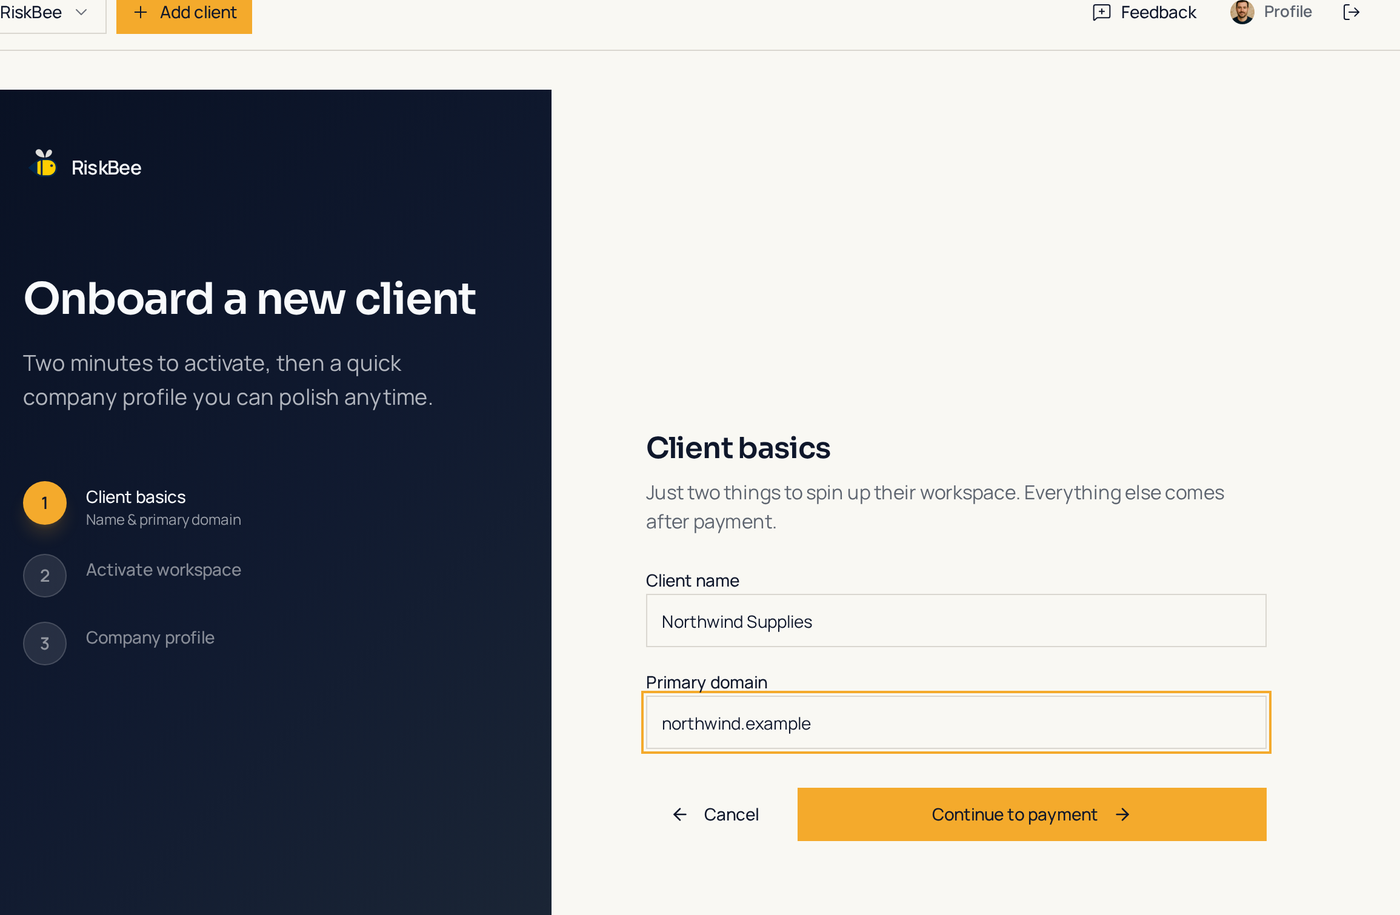
Click "Add client" in the top app bar to open the onboarding wizard. Enter the client's name and primary domain. RiskBee checks for an in-progress seat with the same name or domain before creating the client organisation.
Step 2 - Activate the workspace
Choose a billing currency and complete the embedded Stripe checkout to activate the seat. A webhook confirms payment and flips the client from "pending payment" to "awaiting profile" automatically - the wizard polls in the background until it sees the update, so there is nothing to refresh manually.
Step 3 - Company profile
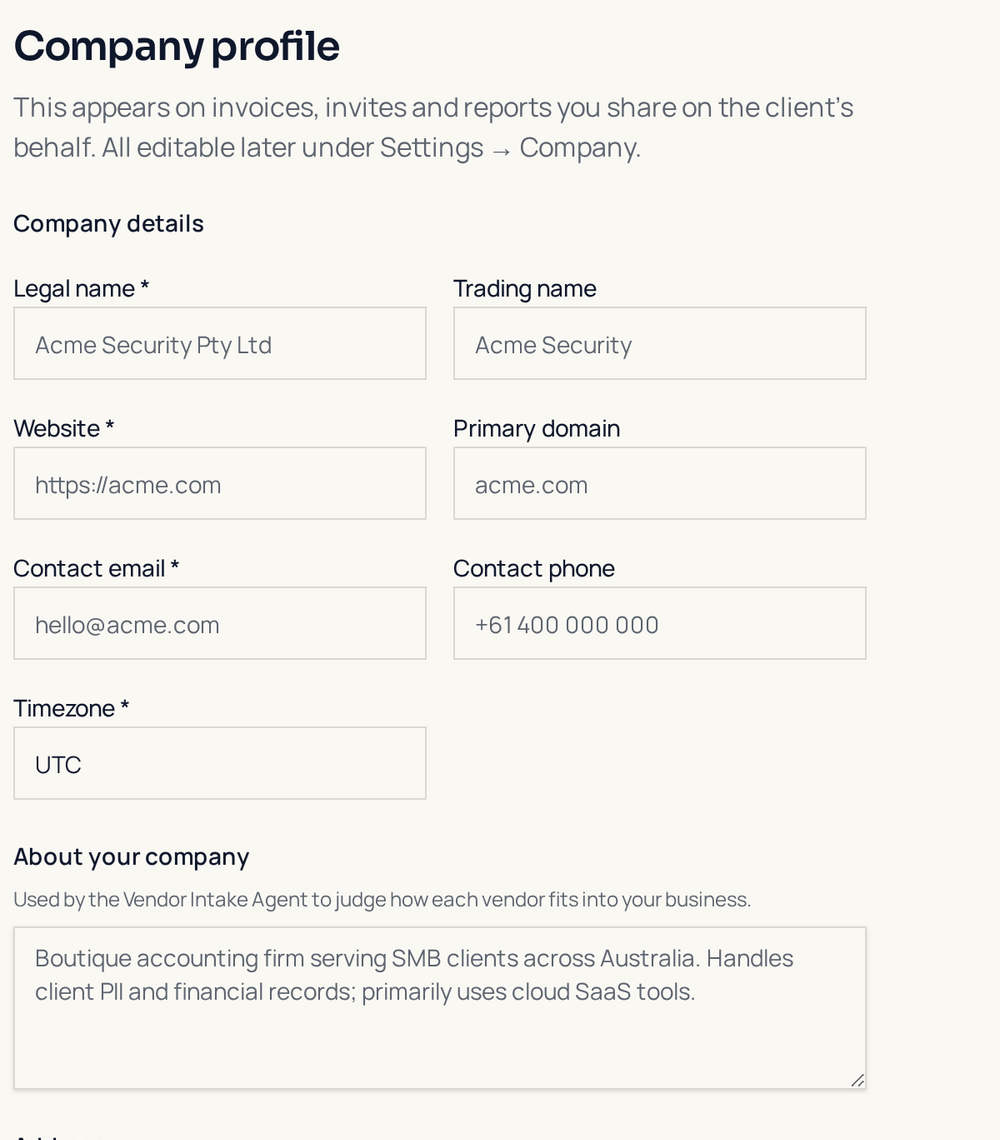
Fill in the client's legal name, trading name, website, address, country, primary contact and timezone. Selecting "Finish onboarding" saves the profile and marks the client active, then takes you to the client roster at Clients.
Inviting client-side users
Once a client is active, open its card on the Clients page and use Invite user to send a token-based invitation. The recipient opens the link, previews what they are being invited to, and signs up or signs in (email and password, Google, or Microsoft). They land inside that client's workspace automatically - no manual role assignment needed on your side. Pending invitations can be resent or revoked from the same card at any time.
What happens next
Once onboarding is complete, the client shows up under your managed clients in the workspace switcher. Switching into it scopes the whole app - vendors, assessments, tasks and contracts - to that client, so nothing you build for one client leaks into another. See managing multiple clients from one account for how that switching works, or jump straight to sending your first questionnaire.